Friday, May 29, 2020

Philips LX8200SA 22S AV System-Home Theater Audio-How to reprogram DVD version matrix, How to check the version matrix and firmware version number, power amplifier schematic

For repair information on the SD4.00SA DVD Module, refer to Service Manual "DVD Module SD-4.00SA_CH - 3122 785 12480".
For repair information on the Subwoofer SW8000SA/00S, refer to Service Manual "SW8000SA/00S/01S/17S - 3139 785 30099"
Output power (6 ohm, 1kHz, 10% THD) L & R, Center, Surround : 40W RMS / channel
Amplifier Frequency Response (-3dB) : 250Hz-32kHz
SOUND: JAZZ, ROCK, DIGITAL, CLASSIC [DRAMA, ACTION, SCI-FI, CONCERT]
[.....] Sound effect available when playing a DVD/VCD disc.
Input sensitivity
Aux in (at 1kHz) : 880mV ± 3dB
TV in (at 1kHz) : 350mV ± 3dB
Output sensitivity
Line out (Left/Right) : 0.6V ± 2dB at 100 kohm
Center out (Vol. Max.) : 500mV ± 2dB at 47 kohm
Subwoofer out (Vol. Max.) : 0.76V ± 2dB at 47 kohm
Headphone output at 32 ohm : 660mV ± 2dB (Vol. Max.)
Digital in : IEC 60958
Digital out : SPDIF Coaxial
Reprogramming of DVD version matrix [Only a qualified service person should do the reprogramming.]
After replacement/repair, the customer settings and also the region code may be lost.
Reprogramming will put the set back in the state in which it has left the factory, i.e. with the default settings and the allowed region code.
Reprogramming is done by the Remote Control.
Complete version matrix to be enter is
'PLAY 159 XXX XXX XX PLAY'
1) Ensure no disc is loaded in the tray.
2) Set the Remote Control to
DISC source.
3) Press <PLAY> followed by numerical keys <1> <5> <9>
Remark: Top left hand corner of the TV screen will display "X" for all these 4 keys that you have pressed.
4) Press now the following numerical keys (8 digits version matrix):
Remark: Nothing will be displayed on the TV screen for all these 8 digits that you have pressed.
for LX8200SA/22S : <2> <2> <2> <0> <3> <7> <0> <8>
5) Press <PLAY> again.
Caution: Wait for about 3 seconds for the set to reset to the required setting.
The TV screen will turn blue follow by a loud sound at the speaker output.
6) Disconnect mains to ensure proper reset.
How to check the version matrix and the software version number of the set:
1) Power up the set and select
DISC source.
2) Press <SYSTEM MENU> on the Remote Control to enter the User Preference Manual (UPM),
follow by pressing the following key:
-
<Cursor Down> key 4 times
-
<Cursor Right> key 1 time
-
<Cursor Down> key 4 times
3) Message "(C)PHILIPS 01- 02 5580 W.WW.WW ...... PXXXXXXXX Y.YY.Y" will be displayed
on the TV screen:
W.WW.WW
- indicate the BEA software version number
PXXXXXXXX - indicate the version matrix programmed
Y.YY.Y
- indicate the FEA (servo) software version number
4) Press <SYSTEM MENU> on the Remote control to exit.
Setting the TV system default
Press <SYSTEM MENU> on the Remote Control to enter the User Preference Manual (UPM).
2) From the User Preference Manual on the TV screen, select TV SYSTEM to change the TV system default
accordingly as shown in the table below:
Version
/21R
/21S
/22S
/30S
/33S
/37S
Region
Region 3
Region 4
Region 2
Region 4
Region 3
Region 1
TV system default
AUTO
NTSC
PAL
AUTO
AUTO
NTSC

3) Press <SYSTEM MENU> on the Remote control to exit.
Power amplifier board circuit diagram 

Thursday, May 28, 2020

Sony HCD DX155, Sony HCD DX255 How to disassemble and reassemble the DVD mechanism, how to take out the disc when there is no power

Note on MAIN board replacement
New part of EEP ROM (IC1103) on the MAIN board cannot be used.
Therefore, if the mounted MAIN board (A-1151-985-A, etc.) is replaced, exchange new EEP ROM (IC1103) with that used before the replacement.
When displaying the version number on the screen
When you turn on the system, the version number [VER.X.XX] (X is a number) may appear on the screen. Although this is not a malfunction and for Sony service use only, normal system operation will not be possible.
Turn off the system, and then turn on the system again to operate.
When the self-diagnosis function is activated to prevent the system from malfunctioning, a 5- character service number (e.g., C 13 50) with a combination of a letter and 4 digits appears on the screen and the front panel display.
C 13: The disc is dirty.
Clean the disc with a soft cloth.
C 31: The disc is not inserted correctly.
Restart the system, then re-insert the disc correctly.
E XX (xx is a number): To prevent a malfunction, the system has performed the selfdiagnosis function.
Contact your nearest Sony dealer or local authorized Sony service facility and give the 5- character service number.
Example: E 61 10
The laser beam on this model is concentrated so as to be focused on the disc reflective surface by the objective lens in the optical pickup block. Therefore, when checking the laser diode emission,
observe from more than 30 cm away from the objective lens.
LASER DIODE AND FOCUS SEARCH
1. Open the cover and turn POWER on with no disc inserted.
2. Confirm that the following operation is performed while observing the objecting lens.
1)Confirm that laser beam is spread.
2)Up and down motion of the objective lens. (3 times)
DISC TRAY LOCK
The disc tray lock function for the antitheft of an demonstration disc in the store is equipped.
Setting Procedure :
1. Press the Power button to turn the set on.
2. Press the [FUNCTION] button to set DVD function.
3. Insert a disc.
4. Press the Stop button and the Eject  button simultaneously for five seconds.
5. The message “LOCKED” is displayed and the tray is locked.
Releasing Procedure :
1. Press the Stop button and the Eject  button simultaneously for five seconds again.
2. The message “UNLOCKED” is displayed and the tray is unlocked.
 When “LOCKED” is displayed, the tray lock is not released by turning power on/off with the Power button.
HOW TO OPEN THE DISC TABLE WHEN POWER SWITCH TURNS OFF
Fix the capacitors with adhesive agent as follows
Fixing the capacitors with adhesive agent is required by the safety regulation.
Be sure to fix the capacitors with adhesive agent when part or circuit board is replaced.
When installing a new op unit / precaution before unsoldering the static electricity prevention solder bridge
Be sure to connect the flexible printed circuit board first of all before removing the static electricity prevention solder bridge by unsoldering. Remove the static electricity prevention solder bridge by unsoldering after the flexible printed
circuit board has already been connected.
(Do not remove nor unsolder the solder bridge as long as the OP unit is kept standalone.)
Disassembly and reassembly of the DVD mechanism

Wednesday, May 20, 2020

STR KS600 Sony FM-AM stereo receiver, test modes, schematic Using STR F6168 as SMPS Switching Regulator

Sony STR-KS600PM/KS600PW FM STEREO/FM-AM RECEIVER
AEP Model: STR-KS600PM/KS600PW
UK Model: STR-KS600PM
STR-KS600PM is the receiver section in HT-SF800M.
STR-KS600PW is the receiver section in HTP-32SS.
Power Output1)
Models of area code CEL, CEK
(4 ohms 1 kHz, THD 0.7%)
FRONT2): 70 W/ch
CENTER2): 70 W
SURR2): 70 W/ch
(4 ohms 100 Hz, THD 0.7%)
SUB WOOFER2): 70 W
(4 ohms 1 kHz, THD 10%)
FRONT2): 100 W/ch
CENTER2): 100 W
SURR2): 100 W/ch
(4 ohms 100 Hz, THD 10%)
SUB WOOFER2): 100
About area codes
The area code of the receiver you purchased is shown on the lower portion of the rear panel
Any differences in operation, according to the area code, are clearly indicated in the text, for example, “Models of area code AA only”.
Ex: 2-XXX-XXX-XX AA
New part of EEPROM (IC1131) on the DIGITAL board cannot be used. Therefore, if the mounted DIGITAL board (A-1097-941-A) is replaced, exchange new microcomputer and new EEPROM with
that used before the replacement.
TEST MODES
FACTORY PRESET MODE
All preset contents are reset to the default setting.
1. While pressing the PLII and [PRESET TUNING +] buttons, press the I/1 button to turn on the main power.
2. The message “FACTORY” appears and the present contents are reset to the default values.
ALL CLEAR MODE
All preset contents are cleared when this mode is activated. Use this mode before returning the product to clients upon completion of repair.
1. While pressing the PLII and [PRESET TUNING --] buttons, press the Power  button to turn on the main power.
2. The message “CLEARING !” appears and the memories are reset to the default values.
3. When done, the message “CLEARED” appears.
FL CHECK MODE
All fluorescent segments are tested. When this test is activated, all segments turn on at the same time, then each segment turns on one after another.
1. While pressing the [MUTING] and [PRESET TUNING --] buttons, press the Power button to turn on the main power.
2. All segments and all LEDs turn on.
3. Press the [INPUT SELECTOR] button.
4. Half of segments and [VIDEO 1], [SA-CD/CD] LEDs turn on.
5. Press the [INPUT SELECTOR] button once again.
6. Others half of segments and [VIDEO 2], [DVD] LEDs turn on.
7. Press the [INPUT SELECTOR] button once again.
8. All segments and all LEDs turn off.
VERSION MODE
When this mode is used, the model, the destination and the software version number are displayed.
1. While pressing the [SOUND FIELD] and [PRESET TUNING --] buttons, press the Power button to turn on the main power.
2. The model, the destination and the software version number appear.
KEY CHECK MODE
This mode is used to check the key.
1. While pressing the [MUTING] and [INPUT SELECTOR] buttons, press the Power button to turn on the main power.
2. The message “REST 06” appears.
3. Every pressing of any button other than the I/1 button counts down the buttons. The buttons which are already counted once are not counted again.
4. When all buttons are pressed, the message “REST 00” appears.
PROTECTOR AUTO OFF MODE
When this mode is used, a protector on state is maintainable.
1. While pressing the [MUTING] and PLII buttons, press the Power button to turn on the main power.
2. The message “PROT EVER” appears.
SOUND FIELD CLEAR MODE
The preset sound field is cleared when this mode is activated. Use this mode before returning the product to clients upon completion of repair.
1. While pressing the [SOUND FIELD] button, press the Power button to turn on the main power.
2. The message “SF. CLR.” appears and initialization is performed.
RDS AUTOBETICAL MODE
1. While pressing the [INPUT SELECTOR] button, press the Power button to turn on the main power.
2. The message “AUTO-BET” appears and scans and stores all the FM and FM RDS stations in the broadcast area.
3. When done, the message “FINISH” appears.
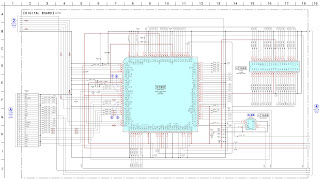
Digital board schematic

D-Amp board schematic
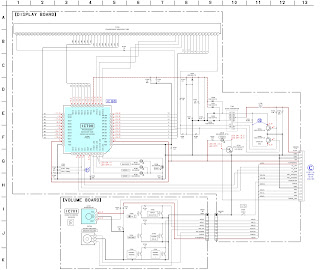
Display board schematic
Power supply [SMPS] and speaker out section schematic

Tuesday, May 19, 2020

Samsung DV5008JGW3YGG Clothes Dryer – How to disassemble, how to troubleshoot, error codes, details, schematic and more

As some electronic components of PCB may be damaged by the charged static electricity from the resin part of dryer or a human body, please remove the potential difference of electricity of the human body and dryer by touching the power cord before you work with PCB.
Be careful that an electric shock may occur by touching the PCB because strong (AC 230V, 240V) and weak (AC12V, 5V) electricity are applied to the PCB.
Do not replace the PCB assembly based on wrong diagnosis. The PCB itself is designed with high reliability. If you decide that the PCB should be replaced, then please follow the procedure of trouble diagnosis.
General Error Function
When an error occurs, this function starts to keep generating error buzzer sound and displays error indicators as shown in the followings per corresponding error by blinking in 0.5sec intervals until the error status is completely cleared out. In this case, all the driving devices are turned off until the error is cleared out.
THERMISTOR ERROR.
1-1. Display shows 'E5'
In case the Thermistor or Thermistor Circuit short.
The temperature of thermistor is more than 65
for more than 5 sec.
1-2. Display shows 'E1'
In case the Thermistor or Thermistor Circuit Open.
MOTOR ERROR
Display shows 'E3'
In case the Motor or Motor Circuit Open.
HEATING ERROR
Display show 'EH'
This Error message occurs only ' HEATING TEST MODE '.
The temperature of thermistor rises less than 2
for 1 minute.
Test Mode
Driving Compartment Test Mode.
1-1.Press and buttons simultaneously
1-2.Display shows 'tA' after whole lamps turn on for 3 seconds
1-3.Press
button
1-4.Motor ON (1sec)
Off (1sec) Heater On (1sec) Off (1sec) Continue
Heating Test Mode.
1-1.Press and buttons simultaneously
1-2.Display shows 't5'
1-3.Check the Motor pulse, Heating temperature.
1-4.EH: Heating Error, E3: Motor Error.
Schematic diagram and PWB control
Main Components
Disassembly
ASSY-COVER TOP
1) Remove 2 screws fixing the top-cover on back side.
2) Push the top-cover back about 15mm and pull it up.
3) It's possible to exchange and service Panel(PCB), Thermostats and Door-Switch.
Back Cover.
1) Remove three screws fixing the Cover to Frame.
2) It's possible to exchange and service Condenser, Thermistor and release the belt from the motor.
Assy-Door.
1) Remove 4 screws fixing two Hinge-doors.
Front Frame.
1) Remove the top-cover.(Step1.)
2) Remove the screw fixing the Panel-Drawer on inside.
3) Remove the Cover-Drawer by using the dryer.
4) Remove the screw fixing the Control-Panel on front side and the screw on right side.
5) Remove the Cover-Front(L) by using the (-) driver.
6) Remove 2 screws fixing the Frame-Front and Duct-Front.
7) Remove 8 screws fixing the Frame-Front.
8) Disconnect the wire-housing from the Door-Switch.
Assy-Drum
1) Remove the 3 screws fixing Duct-Front.
2) Remove the 2 Special-screws and 4 screws fixing the Upper-Plate.
3) Remove the screw fixing the Cover-Bushing.
4) Remove the E-Ring using (-) driver.
5) Remove the Washer.
6) Remove the Belt.
7) Pull out the Assy-Drum.
Assy-Motor.
1) Remove the Spring on the Bracket-Idler.
2) Disconnect the wire-housing from the Motor, Condenser and Thermistor.
3) Lay down the dryer on back side.
4) Remove 2 of 4 screws and loose other 2 screws.
5) Push the Assy-Motor front about 10mm and pull it up.
Heater
1) Disconnect the wire-housing from the Main Wire-Harness behind the Cover-back.
2) Remove 4 Holder-wires inside the Frame.
2) Remove 4 screws fixing the Cover-Heater.
3) Remove 2 nuts fixing the Cover-Heater and Heater.
4) Remove 2 washers.
Assy-Door
1) Remove 4 screws fixing the Door-Front side.
2) Remove 2 Cover-Hinges.
3) Remove 4 screws fixing the Hinge-Doors.
4) Remove the 2 screws fixing the 2 Lever-Doors.
5) Remove the 2 Cover-Screws.  (Reversing the Door: reassemble steps)
1) Exchange the place of Hinge-Doors and Cover hinges.
2) Exchange the place of Lever-Doors and Cover-Screws.
3) Rotate the Door-Front 180°
4) Reinstall 4 screws removed Step1.
Assy-Motor&Duct
1) Remove 5 screws fixing the Cover-duct fan.
2) Remove nut fixing the Fan.  (When griping the Vice Plier, Avoid not to damage Pulley tooth)
3) Remove 3 screws fixing the Duct-fan.
4) Remove 2 screws fixing the Fixer-Motor and Pull out Assy-Motor
Exploded view

Friday, May 08, 2020

Sony HCD SH2000 How to disassemble, adjustments, how to eject the disc during a power failure HI-Fi component system

How to eject the disc at emergency, How to reset the set, how to do a factory reset, Cold reset, mechanism disassembly – SONY HCD SH2000 Hi Fi Component System.
HCD-SH2000 is the tuner, USB, CD and amplifier section in FST-SH2000 or LBT-SH2000
CD Mechanism Type: CDM86B-DVBU101
Optical Pick-up Name: KHM-313CAB/C2NP
This product contains technology subject to certain intellectual property rights of Microsoft. Use or distribution of this technology outside of this product is prohibited without the appropriate license(s) from Microsoft.
Amplifier section
The following are measured at AC 120 V - 240 V, 50/60 Hz
Power output (rated): High channel 300 W + 300 W (at 4 Ω, 1 kHz, 1% THD)
Low channel
300 W + 300 W (at 4 Ω, 100 Hz, 1% THD)
RMS output power (reference):
High channel
500 W + 500 W (per channel at 4 Ω, 1 kHz)
Low channel
500 W + 500 W (per channel at 4 Ω, 100 Hz)
The laser diode in the optical pick-up block may suffer electrostatic break-down because of the potential difference generated by the charged electrostatic load, etc. on clothing and the human body.
During repair, pay attention to electrostatic break-down and also use the procedure in the printed matter which is included in the repair parts.

The flexible board is easily damaged and should be handled with care.
LASER DIODE EMISSION CHECK
The laser beam on this model is concentrated so as to be focused on the disc reflective surface by the objective lens in the optical pickup block. Therefore, when checking the laser diode emission, observe from more than 30 cm away from the objective lens.
MP3 (MPEG 1 Audio Layer 3) is a standard format defined by ISO/MPEG which compresses audio data. MP3 audio tracks must be in MPEG 1 Audio Layer 3 format.
A logical format of files and folders on CD-ROMs, defined by ISO (International Organization for Standardization).
This is a recording method that enables adding of data using the Track-At-Once method. Conventional discs begin at a disc control area called the Lead-in and end at an area called Lead-out. A Multi Session disc is a disc having multiple sessions, with each segment from Lead-in to Lead-out regarded as a single session.
REPLACING THE IC102 AND IC4605 ON THE DMB21 BOARD
IC102 and IC4605 on the DMB21 board cannot exchange with single. When these parts on the DMB21 board are damaged, exchange the entire mounted board.
REPLACEMENT OF THE MS-214 BOARD
When the MS-214 board is defective, exchange the entire MD (AU) ASSY.
HOW TO EJECT THE DISC WHEN POWER SWITCH TURNS OFF
Note:
 take out the CD mechanism block from a set.
Disassembly
 PANEL TEST MODE
This mode is used to check the fluorescent indicator tube, LEDs, keys, [MASTER VOLUME] jog, model, destination and software version.
Procedure
1. Press [SEARCH] button and [OPTIONS] button simultaneously and hold 3 seconds.
2. All LEDs and segments in fluorescent indicator tube will light up.
3. When you want to enter to the software version display mode, press [FLANGER] button. The model information appears at the fluorescent indicator tube. Press [FLANGER] button again to view the destination information.
4. During the destination information display, press [FLANGER] button. Each time [FLANGER] button is pressed, the fluorescent indicator tube shows the version of each category software in the following sequence: SC, MTK (DMB Board firmware version), UI, PF, SYS, CD, CDMA, CDMB, ST, TA, TAS, TM and return back to model information display.
5. When [SEARCH] button is pressed while the version numbers are being displayed except model and destination, the date of the software creation appears. When [SEARCH] button
is pressed again, the display returns to the software version display.
6. Press [ISOLATOR] button, the key check mode is activated.
7. In the key check mode, the fluorescent indicator tube displays “K 0 V0”. Each time a button is pressed, “K” value increases.  However, once a button has been pressed, it is no longer taken into account.
“V” value increases in the manner of 0, 1, 2, 3 ... if [MASTER VOLUME] knob is turned clockwise, or it decreases in the manner of 0, 9, 8, 7 ... if [MASTER VOLUME] knob is turned counterclockwise.
8. When [SOUND FLASH] button is pressed after all LEDs and segments in fluorescent indicator tube light up, alternate segments in fluorescent indicator tube and LEDs would light up. If you press [SOUND FLASH] button again, another half of alternate segments in fluorescent indicator tube and LEDs would light up. Pressing [SOUND FLASH] button again
would cause all segments in fluorescent indicator tube and LEDs light OFF. Pressing [SOUND FLASH] button again would cause all segments in fluorescent indicator tube and all LEDs light up.
9. To release from this mode, press the [SEARCH] button and [OPTIONS] button in the same manner as step 1, or disconnect the power cord.
COMMON TEST MODE
This mode is used to check operations of the Amplifier section.
Procedure
To enter Common Test Mode
1. Press [USB/USB SELECT] button and [PRESET EQ] button simultaneously and hold for 3 seconds.
2. The upper segments of fluorescent indicator tube will blink.  The function is changed to TV and the volume is changed to VOLUME MIN.
Check of Amplifier
1. Press [PRESET EQ] button repeatedly until a message “GEQ MAX” appears on the fluorescent indicator tube. GEQ increases to its maximum.
2. Press [PRESET EQ] button repeatedly until a message “GEQ MIN” appears on the fluorescent indicator tube. GEQ decreases to its minimum.
3. Press [PRESET EQ] button repeatedly until a message “GEQ FLAT” appears on the fluorescent indicator tube. GEQ is set to flat.
4. When the [MASTER VOLUME] knob is turned clockwise even slightly, the sound volume increases to its maximum and a message “VOLUME MAX” appears on the fluorescent indicator tube.
5. When the [MASTER VOLUME] knob is turned counterclockwise even slightly, the sound volume decreases to its minimum and a message “VOLUME MIN” appears on the fluorescent indicator tube.
To release from Common Test mode
1. To release from this mode, press POWER button.
2. The cold reset is enforced at the same time.
COLD RESET
The cold reset clears all data including preset data stored in the EEPROM to initial conditions. Execute this mode when returning the set to the customer.
Procedure
1. Press the POWER button to turn on the system.
2. Press the STOP button and POWER  button simultaneously for 3 seconds.
3. “COLD RESET” appears on the fluorescent indicator tube.  After that, the fluorescent indicator tube becomes blank for a while, and the system is reset.
TUNER STEP CHANGE
The step interval of AM channels can be toggled between 9 kHz and 10 kHz. This mode is not available for Saudi Arabian, European and Russian models.
Procedure
1. Press POWER button to turn on the system.
2. Press [FUNCTION] button repeatedly to select the “AM”.
3. Press POWER button to turn off the system.
4. Press [ENTER] button and POWER button simultaneously. The system turns on automatically. The message “AM 9K STEP” or “AM 10K STEP” appears on the fluorescent indicator tube and thus the channel step is changed.
CD SHIP MODE (WITH MEMORY CLEAR)
This mode moves the optical pick-up to the position durable to vibration and clears all data including preset data stored in the data flash to initial conditions during the next AC-In. Use this mode when returning the set to the customer after repair.
Procedure
1. Press the POWER button to turn on the system.
2. Select CD function and without dics inserted.
3. Press [EJECT] button and POWER button simultaneously for 3 seconds. The system turns off automatically.
4. A message “MECHA LOCK” is displayed on the fluorescent indicator tube and the CD ship mode is set.
CD SHIP MODE (WITHOUT MEMORY CLEAR)
This mode moves the optical pick-up to the position durable to vibration. Use this mode when returning the set to the customer after repair.
Procedure
5. Press POWER  button to turn on the system.
6. Select CD function and without dics inserted.
7. Press [CD] button and POWER button simultaneously. The system turns off automatically.
8. A message “MECHA LOCK” is displayed on the fluorescent indicator tube and the CD ship mode is set.
DISC THEFT PREVENTION MODE
This mode let prevent disc to be ejected. When this mode is activated, the disc will not eject when [EJECT] button is pressed.
The message “LOCKED” will be displayed on the fluorescent indicator tube. This mode only applied when there is disc.
Procedure
1. Press POWER  button to turn on the system.
2. Select CD function.
3. Press [PLAY/PAUSE] button and [EJECT] button simultaneously for 3 seconds. The message “LOCKED” or “UNLOCKED” displayed on the fluorescent indicator tube.
FACTORY PRESET
This mode is use to load all the factory use preset frequencies into FM 1-FM 20 and AM 1-AM 10. Originally, frequency of FM 1-FM 20 and AM 1-AM10 are set to the minimum frequency.
Procedure
1. Press POWER button to turn on the system.
2. Press [SEARCH] button and [TUNER/BAND] button simultaneously and hold for 3 seconds, message “FACTORY” appears on the fluorescent indicator tube. The function is changed to TUNER automatically.

Friday, May 01, 2020

How to enter the service mode of Sharp 32LS400, Sharp 36LS400 Color Televisions, Service adjustment details, Full Schematic, STRF6626 SMPS Control.

Sharp 32LS400, 36LS400, CL32S40, CL36S40 Color Televisions How to enter the service mode, service adjustments detail, full schematic

Used ICs: M24C01B, IX3256CE [System control], STRF6626 [SMPS drive], TA8427 [Vertical scan output], Upc358C [Side PIN cushion control], F0035ME or F0039ME [HORIZONTAL OUT TRANSFORMER], D2500 [Horizontal scan output transistor], CXA2074 [M.T.S], TC90A45F [COMB FILTER], AN5285K [Sound control], IX11235CE [Audio output], IX3253CE [PIF,SIF,Chroma, Video, Deflection jungle]

POWER INPUT..................................................... 120V AC 60 Hz
POWER RATING
32L-S400, CL32S40 .......................................................... 140W
36L-S400, CL36S40 .......................................................... 165W
PICTURE SIZE
32L-S400, CL32S40 ................................ 3,073cm
2 (476sq inch)
36L-S400, CL36S40 ................................ 3,905cm
2 (605sq inch)
CONVERGENCE ............................................................. Magnetic
SWEEP DEFLECTION .....................................................Magnetic
FOCUS ................................................Hi-Bi-Potential Electrostatic

Service work should be performed only by qualified service technicians who are thoroughly familiar with all safety checks and the servicing guidelines

HIGH VOLTAGE CHECK

High voltage is not adjustable but must be checked to verify that the receiver is operating within safe and efficient design limitations as specified checks should be as follows:

1. Connect an accurate high voltage meter between ground and anode of picture tube.
2. Operate receiver for at least 15 minutes at 120V AC line voltage, with a strong air signal or a properly tuned in test signal.
3. Enter the service mode and select the service  adjustment "S19" and Bus data "01" (Y-mute on).
4. The voltage should be approximately 32.8kV(32LS400, CL32S40)/33.4kV(36L-S400, CL36S40) (at zero beam).
If a correct reading cannot be obtained, check circuitry for malfunctioning components. After the voltage test, make Y-mute off to the normal mode.

X-RADIATION PROTECTOR CIRCUIT TEST

1) Apply 120V AC using a variac transformer for accurate input voltage.
2) Allow for warm up and adjust all customer controls for normal picture and sound.
3) Receive a good local channel.
4) Connect a digital voltmeter to TP653 and make sure that the voltmeter reads 13.8 ±0.7V (32L-S400, CL32S40)/13.2 ± 0.7V(36L-S400, CL36S40).
5) Apply external 17.0V DC (32L-S400, CL32S40)/16.2V DC (36L-S400, CL36S40) at TP653 by using an external DC supply, TV must shut off.
6) To reset the protector, unplug the AC cord and plug the AC cord power ON. Now make sure that normal picture appears on the screen.
7) If the operation of the horizontal oscillator does not stop in step 5, the circuit must be repaired before the set is returned to the customer.

Service mode

For adjustments of this model, the bus data is converted to various analog signals by the D/A converter circuit.

[There are still a few analog adjustments in this series such as focus and master screen voltage. Follow the steps below whenever the service adjustment is required.]

Service mode
Before putting unit into the service mode, check that customer adjustments are in the normal mode. Use the reset function in the video adjustment menu to ensure customer controls are in their proper (reset) position.

Service number selection
Once in the service mode, press the Ch-up or Ch-down button on the remote controller or at the set.
The service adjustment number will vary in increments of one, from "S01" to "P07". Select the item you wish to adjust.

Data number selection
Press the Vol-up or down button to adjust the data number.

To enter the service mode and exit service mode.

While pressing the Vol-up and Ch-up buttons at the same time, plug the AC cord into a wall socket.
Now the TV set is switched on and enters the service mode.
To exit the service mode, turn the television off by pressing the power button.

Service mode display and default set values

VCO Adjustment

1. Connect a digital voltmeter between pin (44) of IC201 and ground.
2. Receive a good local channel.
3. Enter the service mode and select the service adjustment "S10".
4. Adjust the data so that digital voltmeter reads 2.2V.
5. Adjustment is completed, remove the voltmeter, return to "normal" mode.

RF AGC Adjustment

1. Receive a good local channel.
2. Enter the service mode and select the service adjustment "S08".
3. Set the data value to point where no noise or beat appears.
4. Select another channel to confirm that no noise or beat appears.
Note 1 : You will have to come out of the service mode to select another channel.
Note 2 : Setting the data to "00" will produce a black raster.

Screen Adjustment

1. Receive a good local channel.
2. Enter the service mode and select the service adjustment "S03" and set the data value to "00" to set the color level to minimum. (Record original data code under adjustment "S03" before changing) You may skip this step, if you selected a B/W picture or monoscope pattern.
3. Select the service adjustment "S19" and adjust the data value to "01", this turn off the luminance signal (Y-mute).
4. Select the service adjustment "S04" and adjust data value to "4B".
5. Adjust the master screen control until the raster darkens to the point where raster is barely seen.
6. Adjust the service adjustments "S11" red, "S12" green and "S13" blue to obtain a good grey scale with normal whites at low brightness level.
7. Select the service adjustment "S19" and reset data to "00". Select the service adjustment "S03" and reset data to obtain normal color level.
8. Reset the master screen control to obtain normal brightness range.

White Balance Adjustment

1. Receive a good local channel.
2. Enter the service mode and select the service adjustment "S03" and set to "00" (minimum color)(Record original data code under adjustment  "S03" before changing). "S03" does not have to be adjusted, if you selected a B/W picture or monoscope pattern.
3. Alternately adjust the service adjustment data of "S14" and "S15" until a good grey scale with normal whites is obtained.
4. Select the service adjustment "S03" and adjust data to obtain normal color level.

Sub-Picture Adjustment

1. Receive a good local channel.
2. Make sure the customer picture control is set to maximum.
3. Enter the service mode and select the service adjustment "S01".
4. Adjust the data value to achieve normal contrast range.

Sub-Tint Adjustment

1. Receive a good local channel.
2. Set customer tint control to center of it's range.
3. Enter the service mode and select the service adjustment "S02".
4. Adjust "S02" data value to obtain normal flesh tones.

Sub-Color Adjustment

1. Receive a good local channel.
2. Make sure the customer color control is set to center position .
3. Enter the service mode and select service adjustment "S03".
4. Adjust "S03" data value to obtain normal color level.

Sub-Brightness Adjustment

1. Receive a good local channel.
2. Make sure the customer brightness control is set to center position.
3. Enter the service mode and select the service adjustment "S04".
4. Adjust "S04" data value to obtain normal brightness level.

Vertical-Size and Linearity Adjustments

1. Receive a good local channel.
2. Enter the service mode and select the service adjustment "S09".
3. While observing the top and bottom of the screen, adjust "S09" data value to proper vertical size.
4. Using the R502 control adjust for the best linearity.

Vertical Phase Adjustment

1. Enter the service mode and select the service adjustment "S06".
2. Adjust data value to "00".
Note: This must be set "00" when changed data retrace line will appear.

3.58MHz Trap Adjustment

1. Receive a good local channel.
2. Enter the service mode and select the service adjustment "S16".
3. This is a two position adjustment, "00" is ON, "01" is OFF.
4. Adjust data value to "01" for normal viewing.

Sharpness and Audio Balance Adjustments

1. Receive a good local channel.
2. Enter the service mode and select the service adjustments "S05" for sharpness and "S17" for audio balance.
Sharpness adjustment
3. Adjust data value to "24"(center of data range) for sharpness adjustment.
Audio balance adjustment
4. Adjust data value to "20"(center of data range) for Audio balance adjustment.

Vertical Center Adjustment

1. Receive a good CATV channel.

2. Adjust the S502 so that the picture is centered.

Side Pincushion Adjustment

1. Receive a good CATV channel or crosshatch pattern signal.
2. Adjust the R676 so that the outermost line on the screen is straight.

Horizontal Size Adjustment

1. Receive a good CATV channel or crosshatch pattern signal.
2. Adjust the R678 so that the best horizontal size.

Energy save offset Adjustment

1. Enter the service mode and select the service adjustment "S20".
2. Adjust data value to "23".
Note : This position is used to preset the level for the energy save function.

Other Adjustments

1. Enter the service mode.
2. Adjust the following data values as listed below.

MTS ADJUSTMENT

MTS Level Adjustment
1. Feed the following monaural signal to pin (14) of IC3001.
Monaural signal : 300Hz, 245mVrms
2. Connect the rms voltmeter to pin (39) of IC3001.
3. Enter the service mode and select the service adjustment "M01".
4. Adjust the data so that the rms voltmeter reads. Spec : 490 ±10mVrms.

MTS VCO Adjustment
1. Keep the unit in no-signal state.
2. Connect the frequency counter to pin (39) of IC3001.
3. Connect a capacitor (100µF, 50V) in between positive(+) side of C3005 and ground.
4. Enter the service mode and select the service adjustment "M02"
5. Adjust the data so that the frequency counter reads.Spec : 62.94 ±0.75kHz.

Filter Adjustment
1. Feed the following stereo pilot signal to pin (14) of IC3001 .
Stereo pilot signal: 9.4kHz, 600mVrms.
2. Enter the service mode and select the service adjustment "M03".
3. Adjust the data until "OK" appears in position on the screen. Make sure the "OK" is displayed almost at the center of the data range.

Separation Adjustment
1. Connect the rms voltmeter to pin (39) of IC3001.
2. Receive the following composite stereo signal 1.
Composite stereo signal: 30% modulation, left channel only, noise reduction on, 300Hz
3. Enter the service mode and select the service adjustment "M04".
4. Adjust the data until the AC voltage reading of the RMS voltmeter is minimum.
5. Receive the following composite stereo signal 2.
Stereo signal: 30% modulation, left channel only, noise reduction on, 3kHz
6. Enter the service mode and select the service adjustment "M05".
7. Adjust the data until the AC voltage reading of the RMS voltmeter is minimum.
8. Take the above steps 1 thru 8 again for fine adjustment.

P-IN-P ADJUSTMENT [Picture in Picture]

P-IN-P Y LEVEL Adjustment
1. Receive a good local channel.
2. Enter the service mode and select the service adjustment "P01".
3. Adjust "P01" data value to obtain normal contrast level

P-IN-P TINT Adjustment
1. Receive a good local channel.
2. Enter the service mode and select the service adjustment "P02".
3. Adjust data value to "29".

P-IN-P COLOR Adjustment
1. Receive a good local channel.
2. Make sure the customer color control is set to center position.
3. Enter the service mode and select service adjustment "P03".
4. Adjust "P03" data value to obtain normal color level.

P-IN-P Y-OFF SET Adjustment
1. Receive a good local channel.
2. Enter the service mode and select the service adjustment "P04".
3. Adjust data value to "09".

P-IN-P Horizontal-position Adjustment
1. Receive a good local channel.
2. Enter the service mode and select the service adjustment "P05".
3. Adjust data value to "0A".

P-IN-P BURST GATE PULSE (for MAIN)
1. Receive a good local channel.
2. Enter the service mode and select the service adjustment "P06".
3. Adjust data value to "00".

P-IN-P FREE RUN
1. Receive a good local channel.
2. Enter the service mode and select service adjustment "P07".
3. Adjust data value to "0B".

Block diagram

WAVEFORMS

MODELS 32L-S400, CL32S40 SCHEMATIC DIAGRAM: MAIN-1 Unit

MODELS 32L-S400, CL32S40 SCHEMATIC DIAGRAM: MAIN-2 Unit

MODELS 36L-S400, CL36S40 SCHEMATIC DIAGRAM: MAIN-1 Unit

MODELS 36L-S400, CL36S40 SCHEMATIC DIAGRAM: MAIN-2 Unit

SCHEMATIC DIAGRAM: CRT Unit

SCHEMATIC DIAGRAM: P-IN-P Unit & Control unit