Chassis: LA35 Destination: USA. AC 110-127 V, 60 Hz
1. Do not press panel surface to
avoid blue spot on the panel display.
2. Do not use hard cloth or rub the
surface too hard. This may cause scratches on the surface.
3. Take care not to subject the
TV’s surface to water or detergent. Any liquid (including pets urine) if enters
the product could lead to TV failure.
4. Take care not to subject the
surface to insect repellent, solvent, thiner or other voiltile substances. This
may degrade surface quality or cause peeling of the paint.
5. The surface of the display
panel is specially treated and may be easily damaged. Take care not to tap or
scratch with your fingernail or other hard objects.
Service Mode: How to enter into
Service Mode
While pressing [VOLUME ( - )]
button of the main unit, press [INFO] button of the remote control three times
within 2 seconds.
Contents of adjustment mode
Value is shown as a hexadecimal number.
Preset value differs depending on models.
After entering the adjustment mode, take note
of the value in each item before starting adjustment.
How to exit
Switch off the power with the
[POWER] button on the main unit or the [POWER] button on the remote control.
SRV-TOOL: How to access
1. Select [SRV-TOOL] in Service
Mode.
2. Press [OK] button on the
remote control.
Display of SOS History
SOS History (Number of LED
blinking ) indication.
From left side; Last SOS, before
Last, three occurrence before, 2nd occurrence after shipment, 1st occurrence
after shipment.
This indication except 2nd and
1st occurrence after shipment will be cleared by [Self-check indication and
forced to factory shipment setting].
POWER ON TIME/COUNT
Note : To display TIME/COUNT
menu, highlight position, then press MUTE for 3sec.
Time : Cumulative power on time,
indicated hour : minute by decimal
Count : Number of ON times by
decimal
Note : This indication will not
be cleared by either of the self-checks or any other command.
Exit
Disconnect the AC cord from wall
outlet.
Self Check Mode
1. Press the ‘MENU’ button (on
the remote control) and the ‘VOL DOWN’ button on the LCD panel.
2. Press ON/OFF button on the
panel to Exit.
Hotel Mode Adjustment
1. Press the ‘VOLUME DOWN’ button
on the TV panel and simultaneously press the INPUT button on the remote control
3 times to enter Hotel Mode.
2. Set Hotel mode ‘on/off’, then
press ‘EXIT’ to come out.
Hotel Mode
1. Purpose
Restrict a function for hotels.
2. Access command to the Hotel
mode setup menu.
In order to display the Hotel
mode setup menu, please enter the following command (within 2 second). [TV] : Vol [Down] + [REMOTE] : INPUT (3 times).
Then, the Hotel mode setup menu
is displayed.
3. To exit the Hotel mode setup
menu
Disconnect AC power cord from
wall outlet.
4. Explain the Hotel mode setup
menu
Troubleshooting Guide
Use the self-check function to
test the unit.
1. Checking the IIC bus lines
2. Power LED Blinking timing
Check of the IIC bus lines: How to
access
Self-check indication only:
Produce TV reception screen, and
while pressing [VOLUME ( - )] button on the main unit, press [OK] button on the
remote control for more than 3 seconds.
Self-check indication and forced
to factory shipment setting:
Produce TV reception screen, and
while pressing [VOLUME ( - )] button on the main unit, press [MENU] button on
the remote control for more than 3 seconds.
Exit
Disconnect the AC cord from wall
outlet.
Power LED Blinking timing chart
1. Subject
Information of LED Flashing
timing chart.
2. Contents
When an abnormality occurs, the
protection circuit will operate and reset the unit to stand by mode. During
this time, the defective block can be identified by the number of blinking
times of the Power LED on the front panel of the unit as follow:
No Power
First check point
There are following 2 states of
No Power indication by power LED.
1. No lit
2. Red is lit then turns red
blinking a few seconds later.
Voltage chart of
A-Board and P-Board
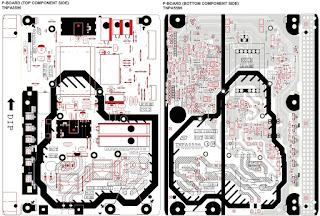
Power board PWB
P-Board Schematic
Diagram [TNPA5596CP]


No comments:
Post a Comment