Applicable to Samsung
TXM2756X/XAA TXM2556X/XAA - CT29F6SWX/XAO CT26F6SWX/XAO - CT29F6SWX/XAP
CT26F6SWX/XAP
Samsung 25, 27, and 29 Inch CRT TV – How to enter Service Mode – SMPS-Deflection – System-Chroma and Audio section circuit diagram.
Factory ModeDo not attempt these adjustments in the Video Mode.
The Factory Mode adjustments are necessary when either the EEPROM (IC902) or the CRT is replaced.
Do not tamper with the “Adjustment” screen of the Factory Mode menu. This screen is intended only for factory use.
When EEPROM (IC902) Is Replaced
When IC902 is replaced all adjustment data revert to initial values. It is necessary to re-program this data.
After IC902 is replaced, warm up the TV for 10 seconds.
Factory/Service Mode
Procedure for the “Adjustment” Mode
This mode uses the standard remote control. The Service Mode is activated by entering the following remote-control sequence :
1.DISPLAY => Factory
2. Standby => Mute => 1 => 8 => 2 => Power On
The “SERVICE (FACTORY)” message will be displayed. The Service Mode has four components: ADJUST, OPTION , G2-ADJUST and RESET.
Access the Adjustment Mode by pressing the “VOLUME” keys ( Up or Down). The adjustment parameters are listed in the accompanying table, and selected by pressing the CHANNEL keys Up/Down.
Selection sequences for the all system; DOWN or UP key:
SCT>SBT>BLR>BLB>RG>GG>BG>VSL>VS>VA>HS>SC>CDL>STT>AKB>PDL>NDL>PSR>NSR>SCBT>VOL>CAP>MVOL>RP00>RP01>FMWS>AGC1>OMD>SCL>PWL>MUS>AGC>DSK>DVDB
The VOLUME keys increase or decrease the adjustment values (stored in the non-volatile memory) when Adjustment Mode is cancelled.
Cancel the Adjustment Mode by re-pressing the “FACTORY” or “Power OFF” keys.
Default data values
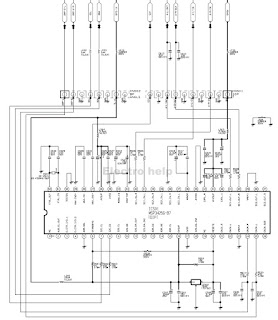
Audio Processor Circuit Diagram
MSP3425G-B7
System control-Chroma Circuit Diagram
TDA9377 – 34C04
SMPS (Power Supply) and Deflection Circuit Diagram
KA7632 – LA7841 – KA500740RT(STR) – FQH 29A001 (LOT) – PS2561 (Opto Coupler) – TL431 (Opto-Driver)
Click on the pictures to zoom in


