
Be careful of the four sharp edges shown in the figure below
when assembling or reassembling.
Printer Mechanism Handling Precaution
When lifting the printer, hold parts shown in the
figure below to prevent the frame from deforming.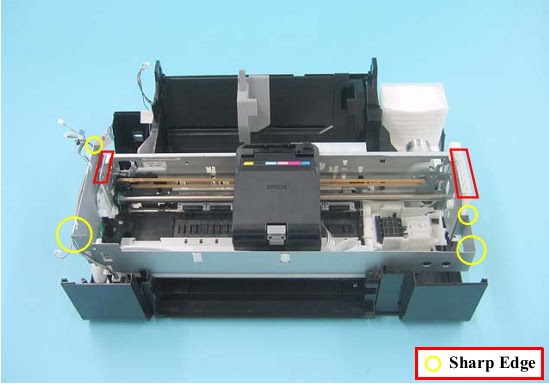
- Do not touch the PF Scale with bare hands or damage it.
- If the Printer Mechanism is tilted leftward about 15°, the PF Scale hits against the desk surface and can break. After removing the Printer Mechanism, take extra care to protect the PF Scale.
- When removing the Waste Ink Tube, take care not to contaminate the printer and surroundings with ink.
- Extra care must be exercised not to scratch or damage the Waste Ink Tube.

Pull out the Waste Ink Tube by hand.

- Release the Waste Ink Tube from the groove of the Waste Ink Tray.
- Release the CR Motor Cable from the two ribs of the Waste Ink Tray
- Disconnect the connector of the CDR Guide Sensor.

- Remove the five screws and remove the Printer Mechanism.
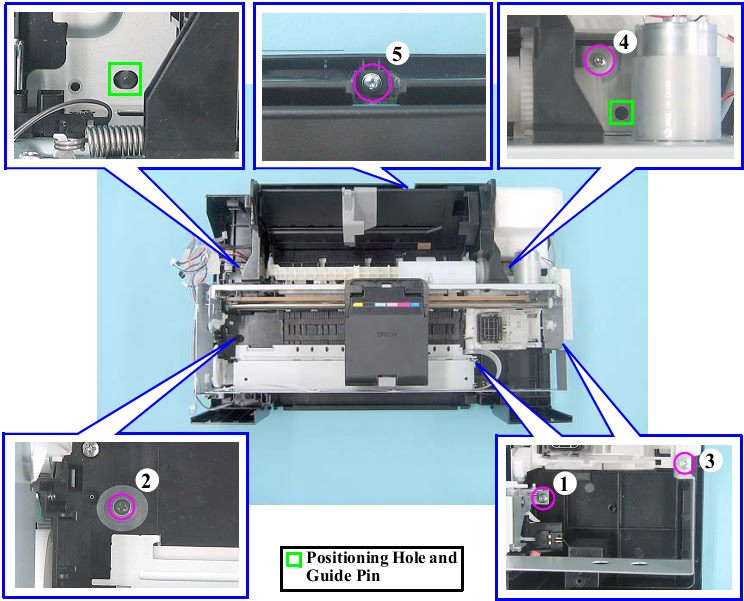
When installing the Printer Mechanism, be careful of the following:
- Wipe off any ink on the joint portion of the Waste Ink Tube before reconnecting the tube. Ink on the joint portion makes the tube likely to get disconnected.
- Insert the Waste Ink Tube over the tube of the Waste Ink Tray until the top end of the Waste Ink Tube contacts with the rib.

- Match the positioning holes with guide pins (two pairs) shown.
- Tighten the screws in the order given.
- Make sure the Waste Ink Tube or cables are not pinched between the Printer Mechanism and the Housing Lower.
- Route the CDR Guide Sensor Cable through the opening.