
The hardware tools requirement are:
- A Parallel port I2C interface with 20 pin to 3 pin cable (Sharp Code: CKIT-0004WJV0).
- Connect Parallel port I2C interface to LPT port of the computer.
- Connect the 20 to 3 pin cable from the I2C interface to the P2306 socket in the main board (XD603).

- Install Visual I2C release V3.2.3b from file (“Setup_Visual_I2C_v3-2-3b8h.exe”).
- It’s strongly recommended to accept the suggested default folder (“C:\Program Files\Micronas\Visual I2C”).
- Install Visual I2C VCTp extension from file (“Setup_VI2C_for_VCT6wxyP_v0111.exe”).
- It’s interesting to change default folder to same as Visual I2C (“C:\Program Files\Micronas\Visual I2C”). During this installation process is possible to install also a complementary software to manage NVM memories .
- This installation is not needed, for this reason uncheck the option when the setup program ask to you. In case of installation it’s interesting to change default folder to same as Visual I2C (“C:\Program Files\Micronas\Visual I2C”).
- Install Parallel driver depending of your Windows version from existing files inside the Visual I2C installation folder “C:\Program Files\Micronas\Visual I2C\Port_Driver”, following next criteria
[B] Windows NT (“Setup_LptDrv_v0104_NT_2000.exe”).
[C] Windows Xp/2000 (“Setup_LptDrv_v020201_XP_2000.exe”).
After installing Visual I2C, the new generated file
structure should look like this:
- Check installation LPT driver using “C:\Program Files\Micronas\LptDrv\LptDrvTest.exe”. After run this software, if LPT driver is installed properly must appear this screen

- If the result is not OK, check inside PC Bios: Parallel Port Mode=EEP
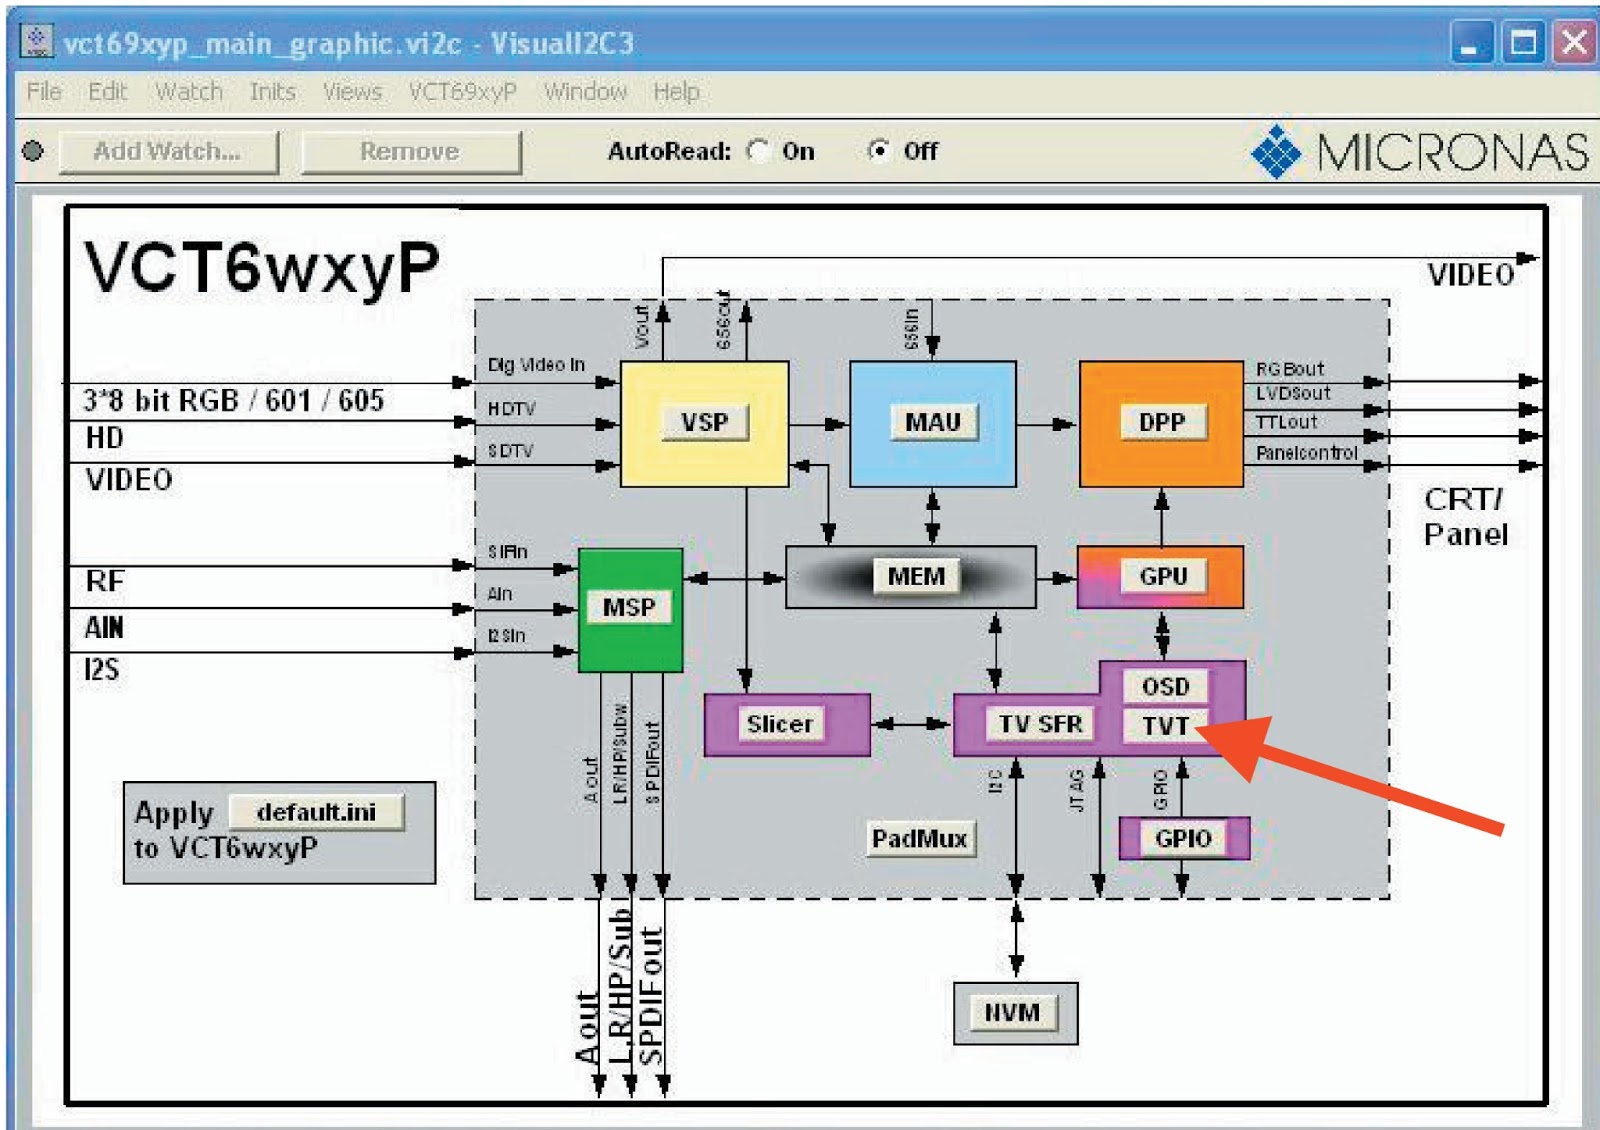
- To run VCTp software update program, click over 'VCTP' icon from the 'Start\all programms\micronas\visualI2C\IC\VCTP and after Visual I2C finish their starting processes click on 'TVT' modlule. As addisional method it is possible to create a direct access to C:\Program files\Micronas\Visual I2C\ic\vct6wxyP\vctq_tvt.vi2c and launch it from windows desktop.

- Set Autoread in ON option.
- Click on “GO” button.
- Wait until “40” appears in Bootloader Version field.
- Close DOS pop up windows pressing any key (“Press any key to continue…”.).
- Click on the “Erase flash” button and wait for a seconds and set the AutoRead to OFF.
- Check in the desired software version is selected in the “Load BinàFlash” option. If it’s not the correct one, double click on the file name and select it. The first time this software is use it’s necessary to confirm write Addressing margin as from 0x0 to 0x7ffff.

- Click on the 'Load Bin -> Flash' to start updating process.

When updating process finishes, the ‘Progress’ pop up window
automatically closes. If appears some problem during the updating
process a error label appears in the file name information line. If the TV has problem to enter in the ‘Bootloader
mode’, it is possible to force it by hardware method. This alternative method is described below.
- Switch off the TV set, or hold VCTp RESET line to GND.
- Pull down the SCL line [pin-1] to GND [pin-3] in P2306 connector.
- Switch on the TV set or release VCTp RESET line.
- Release SCL pull down after minimum of 2 seconds.
- Check if VCTp is in Bootloader mode with Autoread setting in ON.
- Follow the instruction from item 5 on software method.

