
- Torx T6 screwdriver (magnetized)
- Black stick (nylon probe 922-5065) (or other non-conductive nylon or plastic flat-blade tool
- Razor knife
- Kapton tape (922-1731 (0.5-inch x 12-yard roll))
Before you begin, remove the following:
- Battery
- Top case
PART LOCATION

To remove the right fan:
- Peel up any Kapton tape and move the speaker cable safely out of the way, then use a razor knife to cut the length of the tape at the seam between the fan cover and the fins.
- Disconnect the fan cable and remove three screws. Lift out the fan.


To remove the left fan:
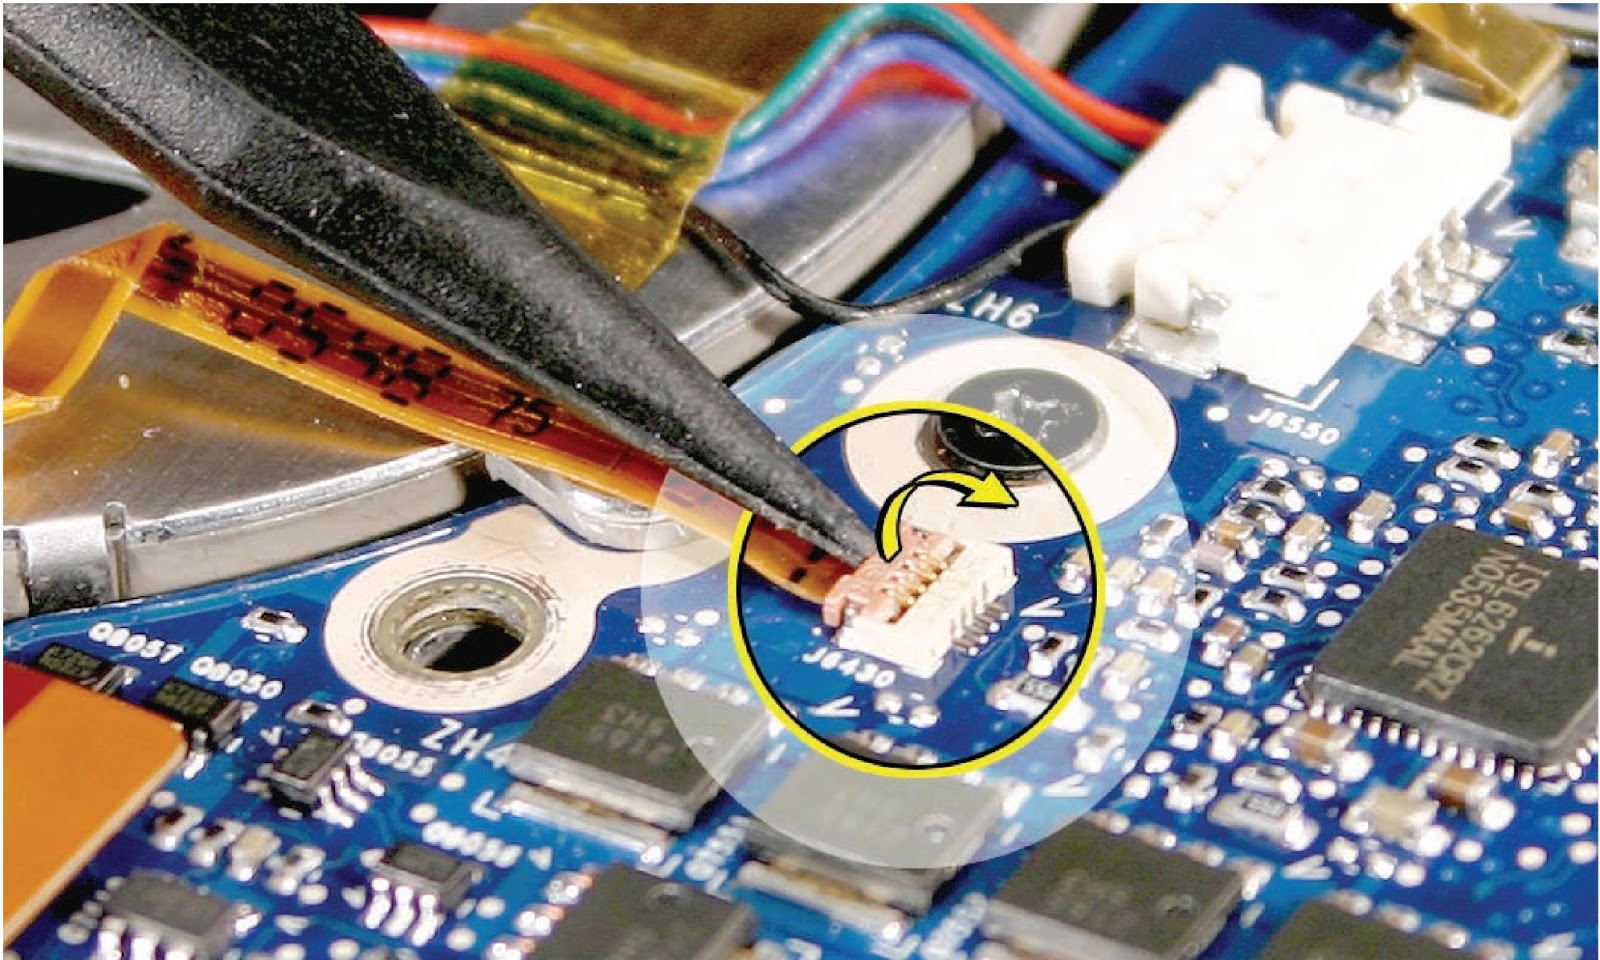
- Disconnect the ambient light sensor flex cable on the logic board (close-up shown below).
- Warning: The connector is very delicate. Breaking the connector mechanism requires a replacement logic board.

- Carefully peel the flex cable off the fan cover.
- Disconnect the cables shown, and move safely out of the way.
- Use a razor knife to cut the length of the tape at the seam between the fan cover and the fins.


- Remove the three screws.
- Slide the fan out from under the left speaker screw tab.


REPLACEMENT
- For both fans, after replacing, apply Kapton tape over the length of the cut tape, to seal.
- Secure the ambient light sensor flex cable to the left fan cover with Kapton tape, if needed.
- Verify that the thermal sensor cable is not caught under the right fan.

