
- Insert your finger into the center of the terminal cover and pull it toward you to detach the terminal cover.
- Remove the four screws 1 and one screw 2.
- Open the cabinet B by approx. 45˚ from the bottom of the cabinet (stand side).
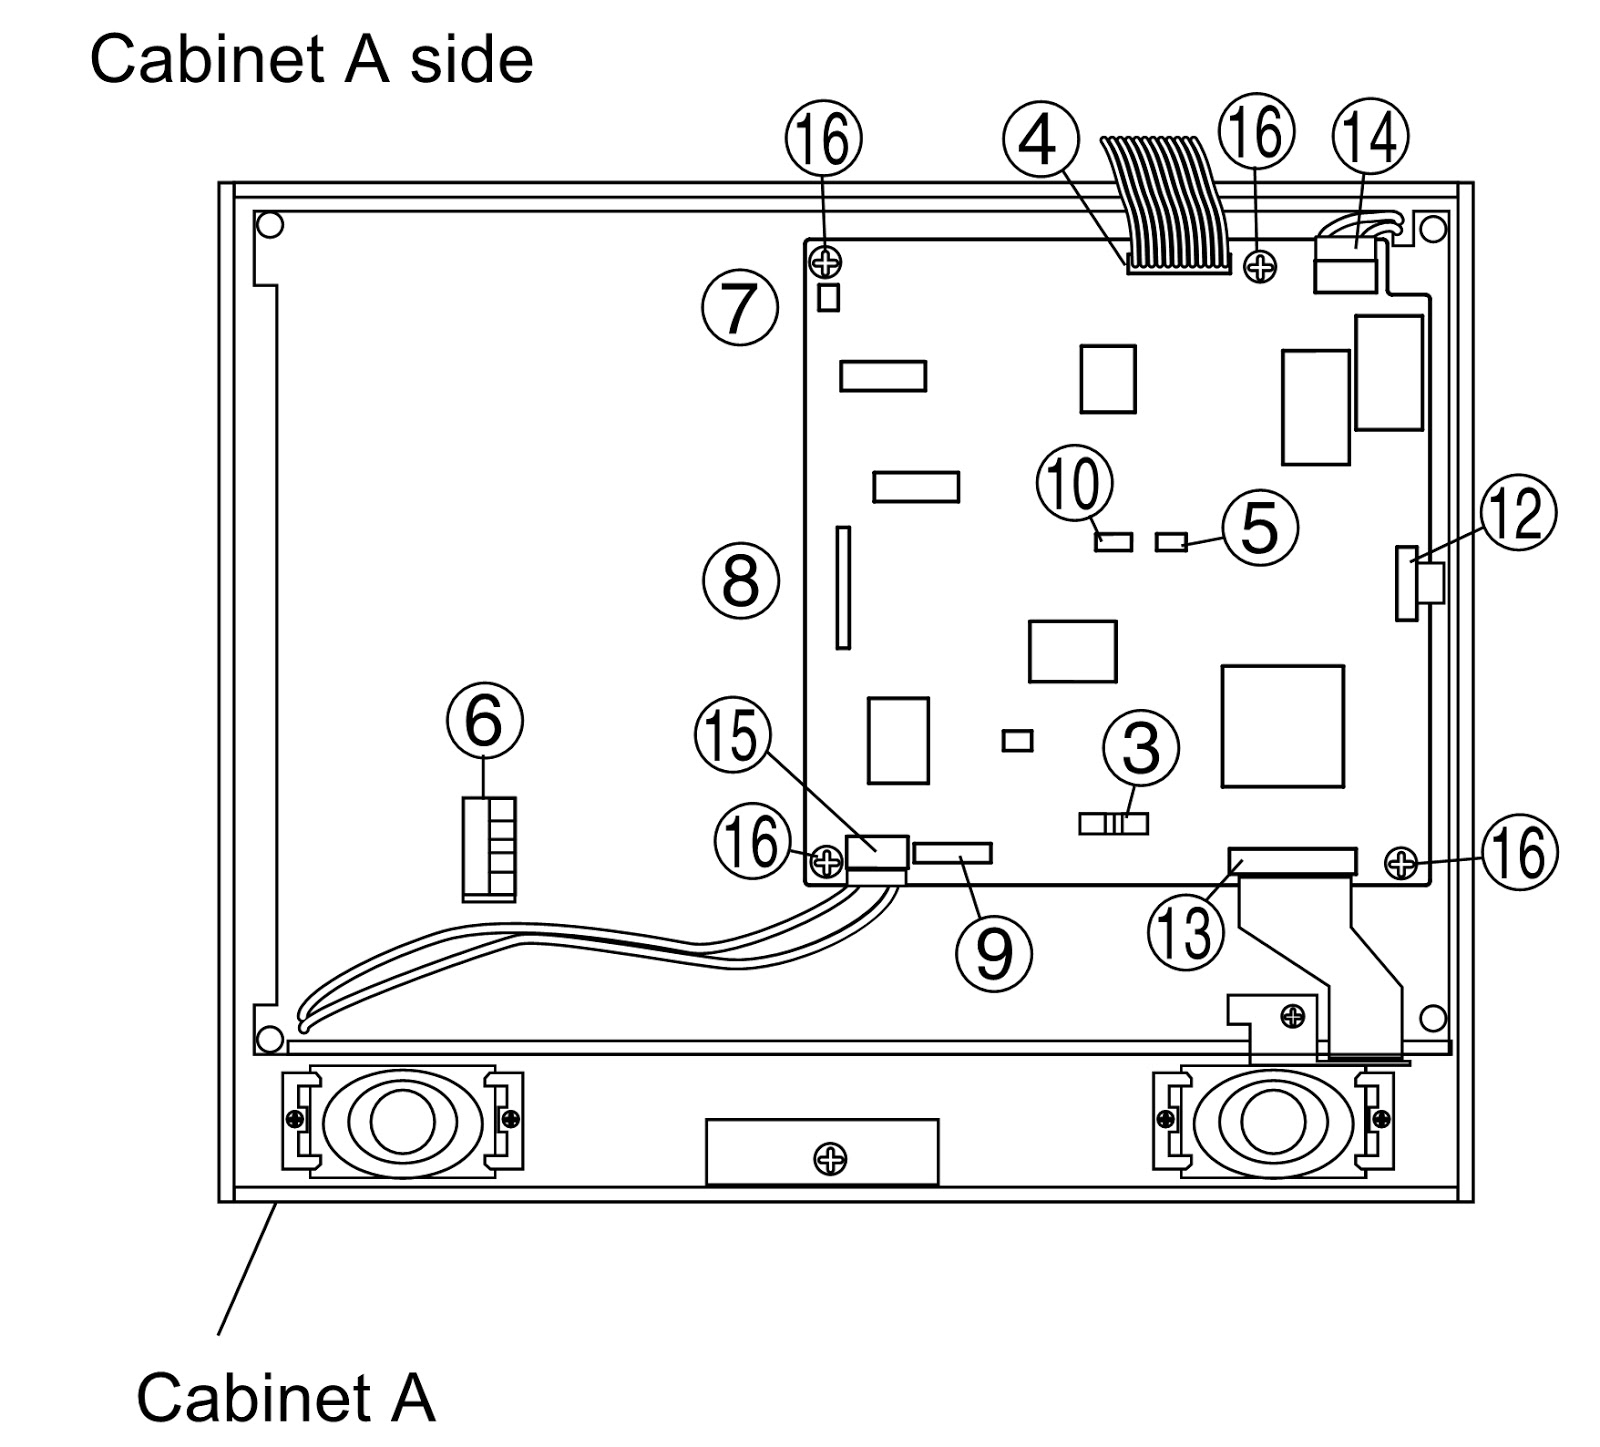
- Remove the lead wire from the cable clamp 3.
- Remove the power connector 4.
- Remove the connector 5 from the light reception unit.
- Remove the lead wire from the cable clamp 6.
- Remove the speaker connector 7.
- Remove the FFC from the FFC connector 8 on the main PWB.
- Remove the connector 9 from the IR unit.
- Remove the connector 10 from the switch PWB.
- Remove the right and left speaker connectors 11 on the terminal PWB.

Disassembly of the main PWB
- Disconnect the flexible cable connectors 12 and 13 from the LCD panel.
- Disconnect the cable connectors 14 and 15 from the fluorescent lamp.
- Remove the four screws 16.

Disassembly of the terminal PWB
- Remove the cover 18.
- Remove the five screws 17.
- Remove the two screws 19. Take them out of the cabinet holes.
Disassembly of LCD Panel
- Remove the six LCD unit fixing screws.
- Remove the shield case.
- Remove the light guide plate holder.
- Remove the reflection panel.
- Remove the light guide plate lamp unit.
- Remove the light guide plate.
- Remove the lamp unit.
- Remove the fixing angle.
- Remove the ITO sheet, diffusion sheet and reflection-polarizing sheet.
