BOCK DIAGRAM
REMOVAL OF LCD MODULE
DISSEMBLE LCD MODULE
REMOVAL OF LCD MODULE
- Disassemble Extrusion Bar drom LCD modlue.
- Remove board bracket from LCD module.
- Remove inner bracket from LCD module.
REMOVAL OF OSD BAORD
Remove OSD connector from OSD board.
Remove OSD board from bracket.
Remove OSD board bracket and OSD Gnd cable from the Extrusion bar.
Remove OSD lens knob.
Frame breakdown.
Remove aluminium bracket frame at four corners of the Extrusion board.
Remove screws.
Remove frame fixture at four corners.
REPLACEABLE PARTS
No
|
Part Name
|
Part No.
|
1
|
Top extrusion bar frame
|
4M320B01
|
2
|
Bottom extrusion bar frame
|
4M320B02
|
3
|
Side extrusion bar frame
|
4M320B03
|
4
|
All frame bracket
|
4M300A07
|
5
|
Frame fixer
|
4M300A07
|
6
|
LCD panel bracket
|
|
7
|
Board bracket
|
4M325B02
|
8
|
Back bracket
|
4M325B02
|
9
|
Stand guide A
|
4M325B05
|
10
|
OSD bracket “I” type
|
4M325B04
|
11
|
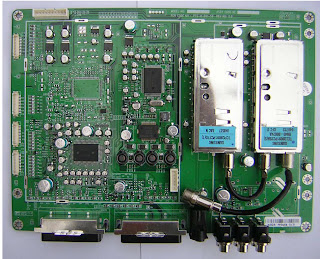
Main board
|
2OTPD003
|
12
|
Sub board
|
2OTPD028
|
13
|
SMPS
|
2OTP046
|
14
|
OSD board 4 key “I” type
|
2OS90014
|
15
|
Inverter cable A
|
3HN30033
|
16
|
LVDS cable 31pin
|
3HN20047
|
17
|
Power control cable
|
3HN60053
|
18
|
Inverter cable ‘A’
|
3HN30033
|
19
|
OSD cable
|
3Hn40026f-01
|
20
|
Power cabe 10 pin
|
3HN60032
|
21
|
Speaker cable
|
3HN80022-01
|
22
|
Power cable 11pin
|
3HN60031-01
|
23
|
Data cable
|
3HN50027
|
24
|
Power inlet cable ass’y
|
3HN70008
|
REMOVAL OF LCD TIMING [T'CON] BOARD
Remove screws from the projection metal plate
Find out FPC which is connected to LCD panel and timing control board.
Disconnect FPC by flipping
Remove the logic board from LCD module
REMOVAL OF INVERTER BAORDS
Remove screws from the protection metal plate.
Disconcerting inverter cables and FPC Cable
Remove inverter board
Main board


