
ANODE CAP REMOVAL
The anode caps are cemented to CRTs. To gain access for high voltage measurement, remove the Red CRTs anode lead from the fallback transformer distributor. Gasp the anode lead protective cap at its bottom and squeeze it against the locking cap body inside, rotate 1/4 turn counterclockwise and pull the anode lead sleeve out of the FBT distributor. Connect a High Voltage Positive lead from the HV meter to the FBT distributor, and common negative lead to cold ground.

Note: Re-insert the anode lead into FBT distributor until it is tightly and fully seated. Turn the locking cap clockwise to lock in place.
DISASSEMBLE PROCEDURE
The speaker Grill must be removed first. It is secured to the cabinet. Grip panel from the sides and middle upper part, gently pull forward to remove.

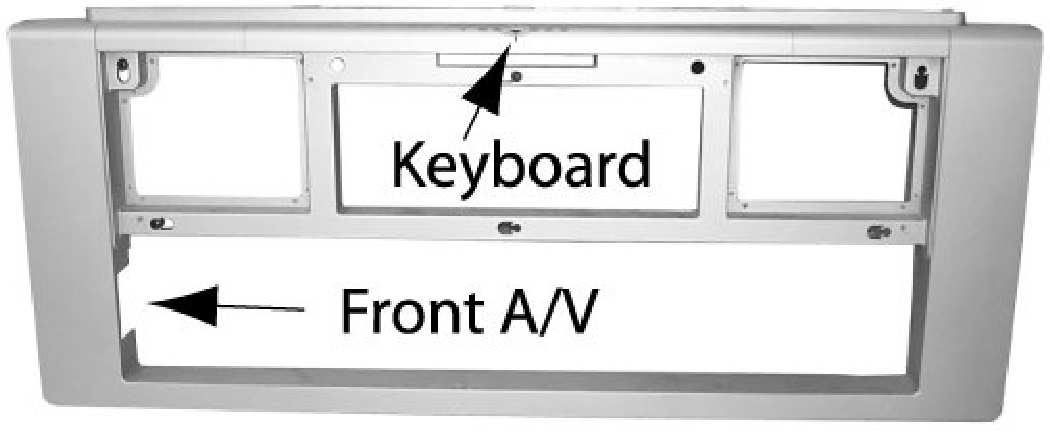
KEYBOARD & FRONT A/V INPUTS REMOVAL.
Remove the speaker grill.
Remove the plastic frame by removing the screws around the lower speaker area. Unplug the connectors from K & G Boards.
Unplug the connectors from the keyboard and front A/V input assemblies. Remove the screws fixing the keyboard to plastic frame; the front A/V inputs are located screwed on the left side of the plastic frame.
BACK LOWER CABINET REMOVAL

MIRROR REMOVAL

SCREEN ASSEMBLY

CHASSIS REMOVAL


DV BOARD

CRT REPLACEMENT


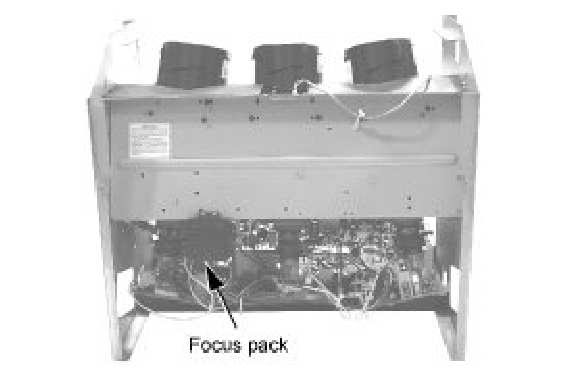
FOCUS PACK LOCATION
CRT ASSY'

PTV SCREEN ASSEMBLIES


